|
In a previous post, I walked you through Phase 1 of a remodeling project, where we figure out what CAN be done with your space. In this post, we will focus on Phase 2 of the process, which is where we figure out what WILL be done. It’s where the conceptual space plan gets real-world details. In this phase we: Make all of the product selections  This includes the cabinet manufacturer, box construction, door style, door finish(es), counter tops, backsplash, flooring, lighting, hardware, appliances, fixtures, and anything else you can think of that would go into your new space. Produce detailed plans and elevations 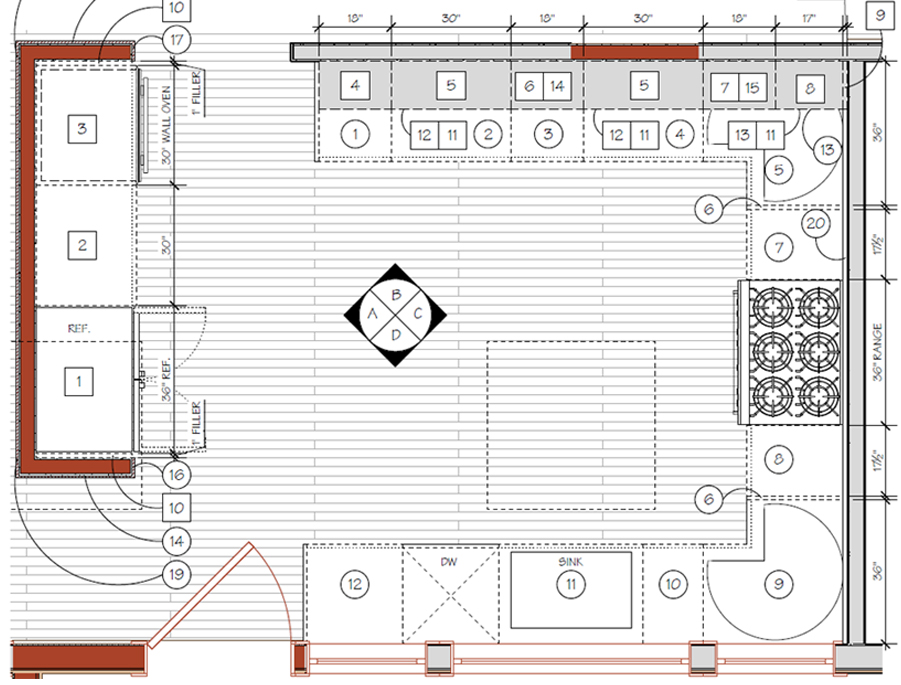 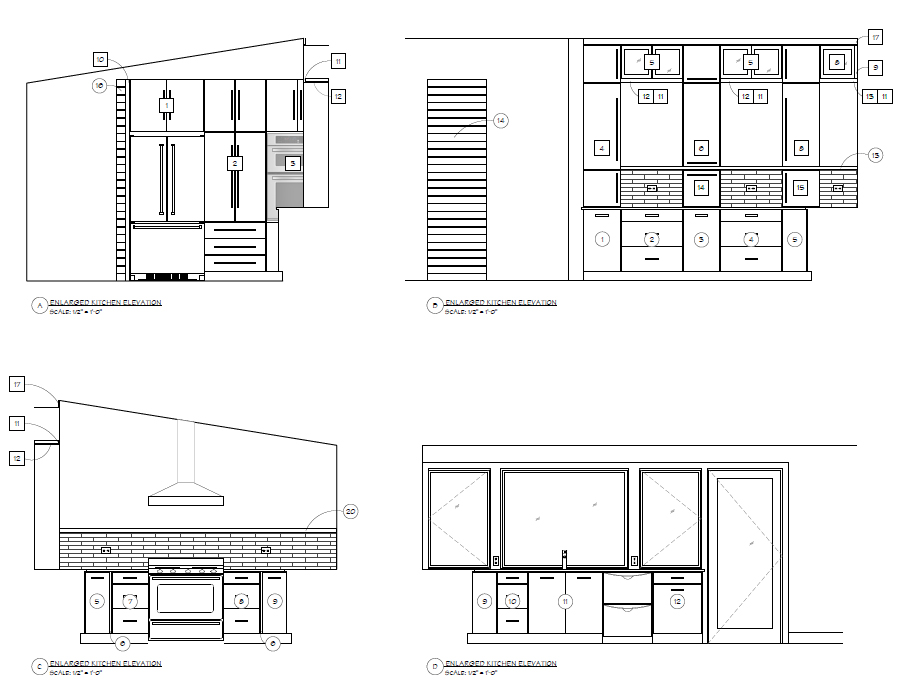 The floor plan gets construction notes and dimension, elevations are drawn and annotated, material schedules are created, specific details are drawn, and they coordinate to paint an extremely clear picture of what this project will look like. Conduct on-site walk through 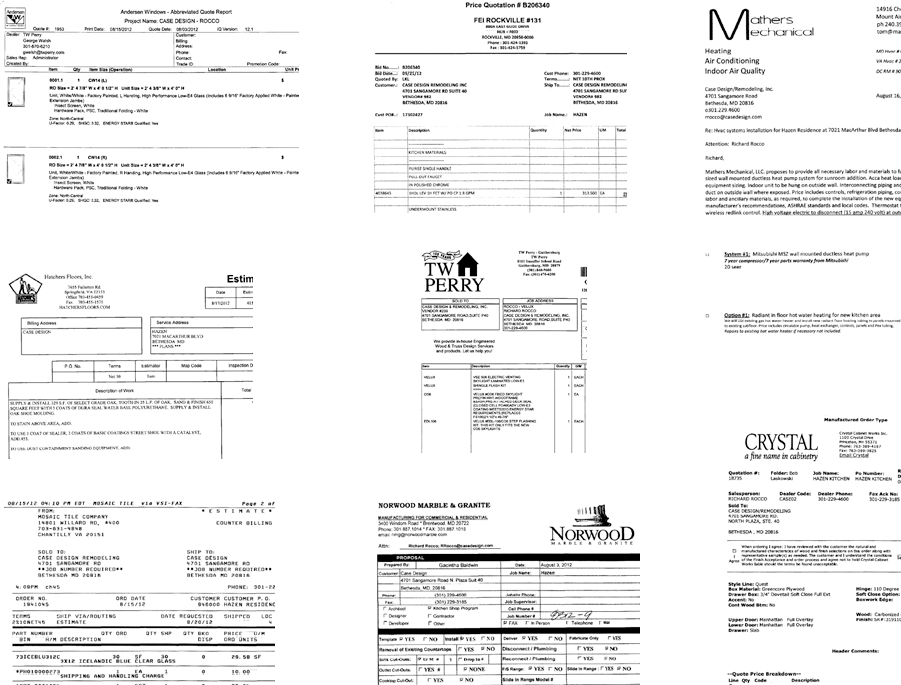 Anyone who is working on your job will be at the on-site walk through. That definitely includes me, your project manager, and your designer. It may include any of the following, depending on the specific project scope: plumber, electrician, flooring specialist, HVAC, mason, roofer, painter, etc. This walk through is leading up to a fixed price contract, so it’s important that everyone working on your project sees the space and understands the scope of work prior. Generate a fixed price contract 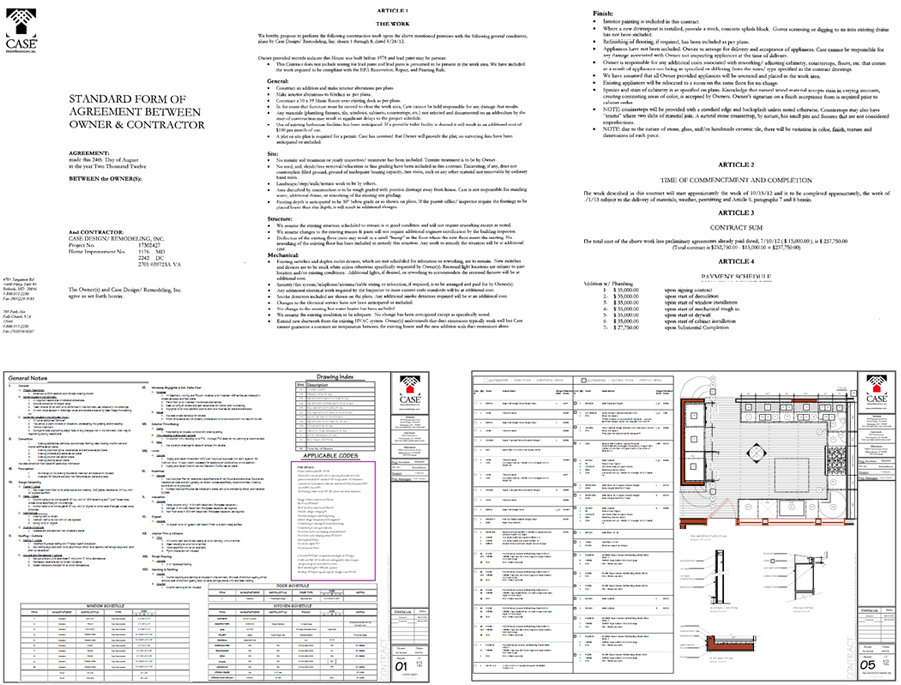 Phase 2 is incredibly thorough. It is important for us to make sure that everyone’s expectations are aligned so there aren’t any surprises once we start construction. Because if getting home from work to find that your new puppy Houdinied his way out of his kennel and used your new couch as a chew toy taught us anything, it’s that unwanted surprises are bad.
So there it is - Phase 2 in a neat little package. If you’re interested in learning about Phase 3, check out my video series on the Case Design/Remodeling blog. Bye for now, TJ
0 Comments
Leave a Reply. |
Copyright 2014-2024 by Designed Happy, LLC .